Install DeepSeek AI Model & Start Your Own Chat

Set up and run DeepSeek-R1 on AWS cloud with EC2, and Try DeepSeek Queries. You can do the same in your own servers, IBM Cloud, Oracle Cloud, Google Cloud, Azure Cloud, or personal laptop. But, I will choose AWS in this post for simplicity.
Goals
Install DeepSeek-R1 in the AWS cloud, open Chat UI and try questions
DeepSeek Models
DeepSeek offers two main models
deepseek-chatbased on DeepSeek-V3 Modeldeepseek-reasonerbased on the DeepSeek-R1 Model
I would install and try DeepSeek-R1 questions on this post, which is an advanced open-sourced AI reasoning model developed by the Chinese startup DeepSeek. These "R1" "reasoning models" introduce a chain-of-thought (CoT) thinking phase before generating an answer at inference time, which in turn improves their reasoning performance and provides interactive answers. They create interactive chain-of-thought (CoT) Q&A to automate further and facilitate "Reasoning" style questions.
Launched in January 2025, it has garnered significant attention for its impressive minimalist approach and cost-effectiveness and reached the top spot by the user's quick adoption.
Steps that are involved in setting up DeepSeek-R1 and UI in AWS
- Provision or Create an AWS EC2 Ubuntu Server
- Install & Start Docker
- Install & Start Ollama
- Ollama is an open-source project that serves as a powerful and user-friendly platform for running LLMs on your servers, cloud, or on your local machine
- Download DeepSeek-R1 Model
- Install & Start Open Web UI with DeepSeek-R1
- Open WebUI is an extensible, self-hosted AI web interface (UI) that supports various LLM runners like Ollama and OpenAI-compatible APIs, with a built-in inference engine for RAG, making it a powerful AI deployment solution.
- Open DeepSeek Chat UI - Open Web UI
- My DeepSeek Questions & Answers
- Fixing Issues
- Good to know
- DeepSeek Model's History
- Comparison of DeepSeek R1 and DeepSeek V3
- DeepSeek R1 Model Training
- References
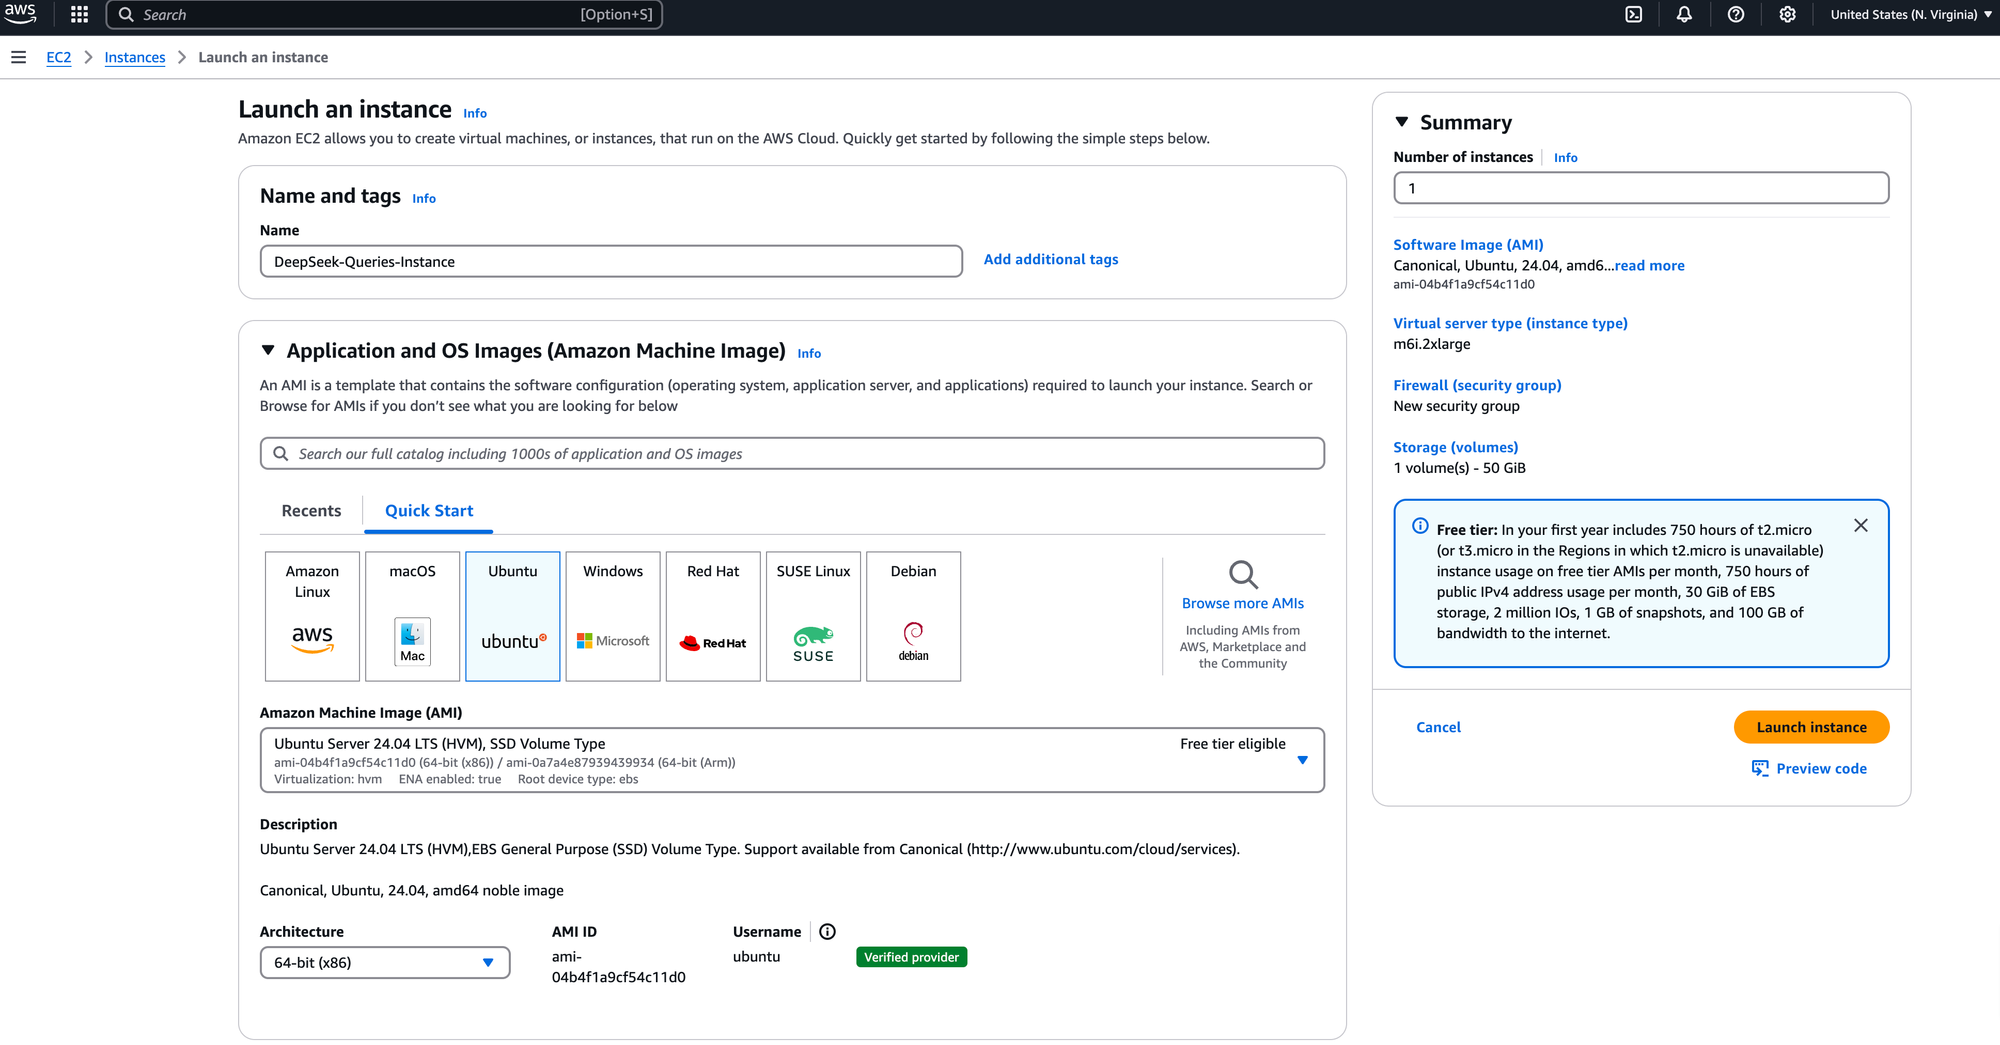
Step-1: Provision or Create AWS EC2 Ubuntu 24.04 Server
- Select the right server instance type
- GPU instance types are always better for best performance due to their parallel processing capabilities. See the list of available instance NVIDIA GPU types at https://aws.amazon.com/ec2/instance-types/g5/. Keep in mind that the Amazon EC2 G5 instances are the latest generation of NVIDIA GPU-based instances.
- But for initial testing purposes, I have provisioned CPU instance type (slower than GPU instance type) to reduce the cost of the server from this list https://aws.amazon.com/ec2/instance-types/m6i/ but it is very important to select GPU type in any real-world cycles.
- Selected m6i.2xlarge with 8 vCPUs, 32 GiB RAM for testing purpose
- Selected 50GB storage
- Cost me $0.384 per hour (GPU instance type with the same 8 vCPUs, 32 GiB RAM would cost me 4 times)
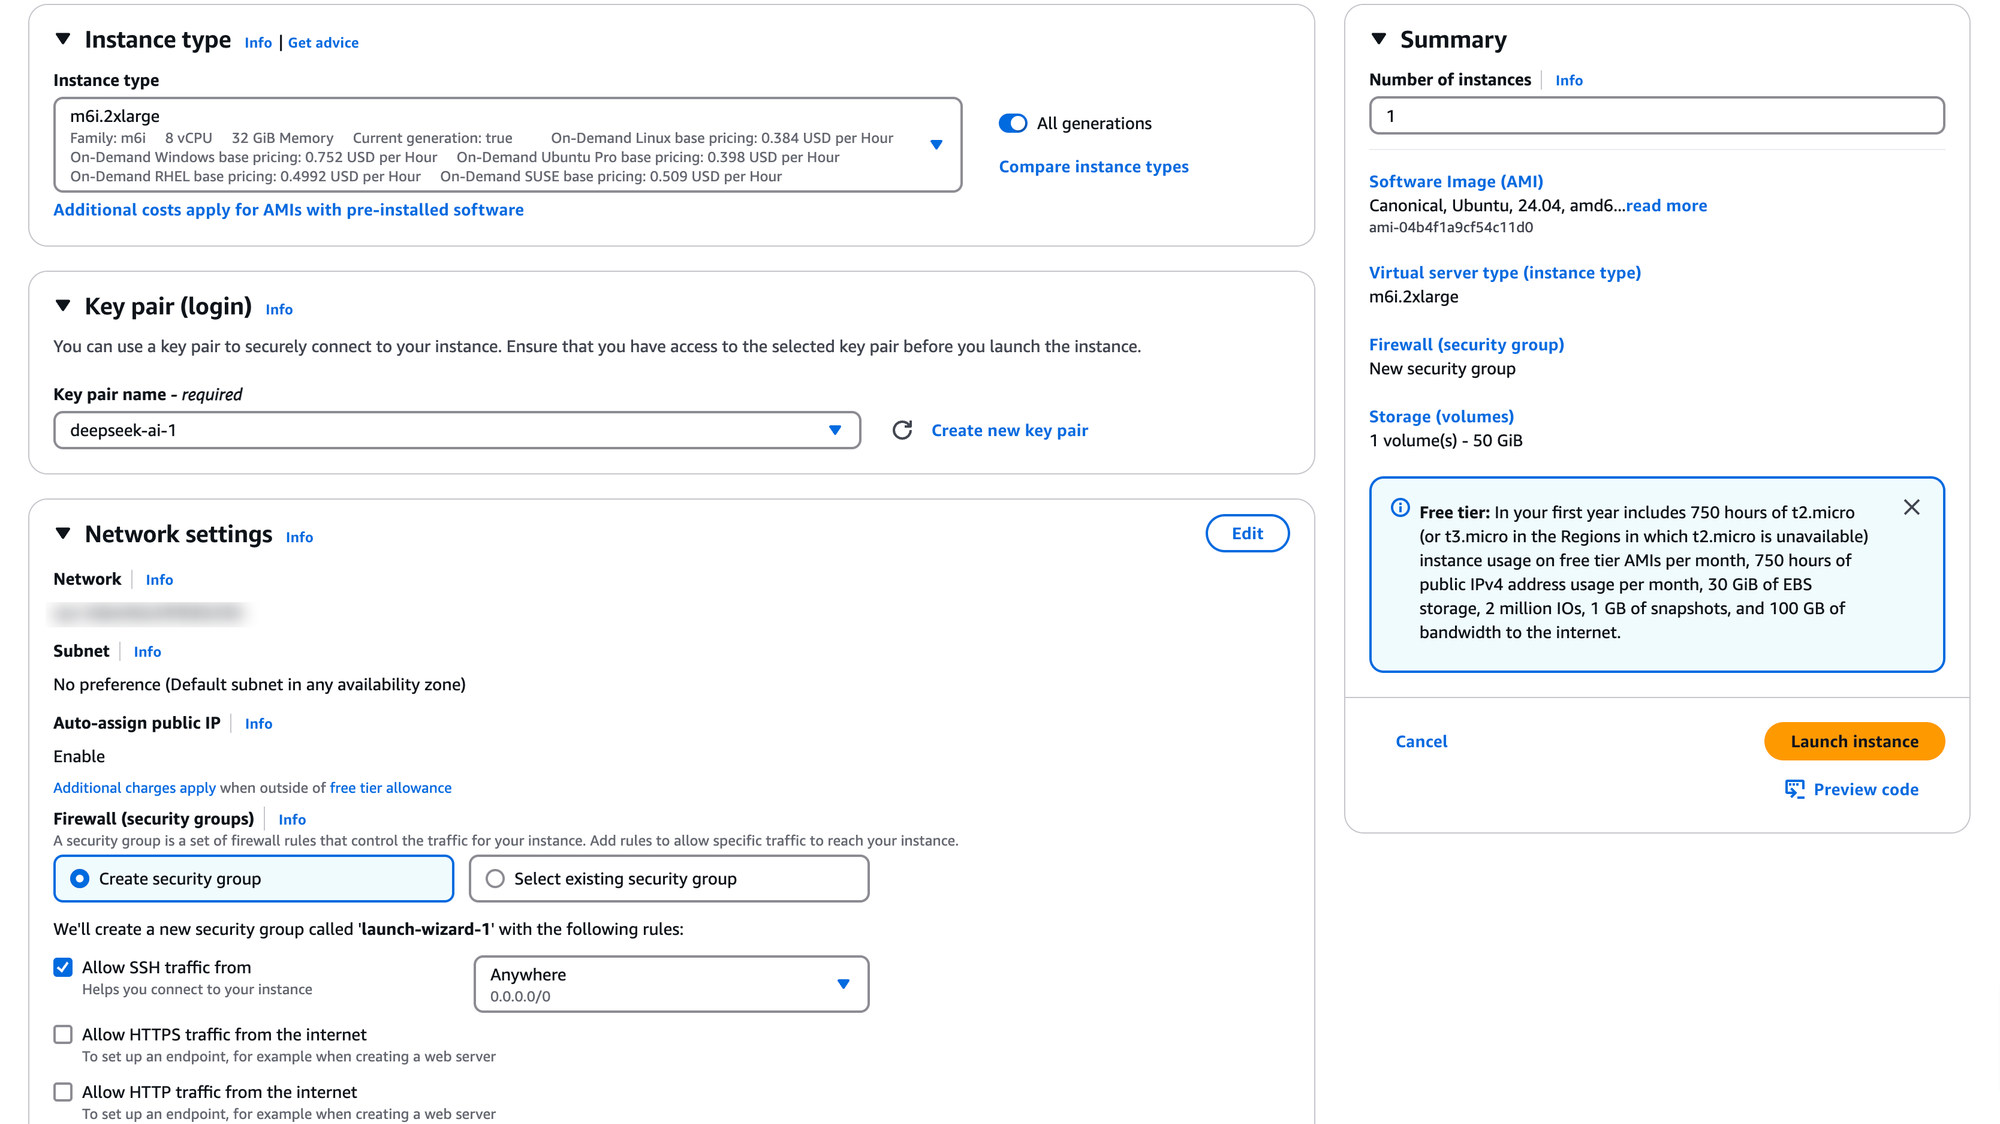
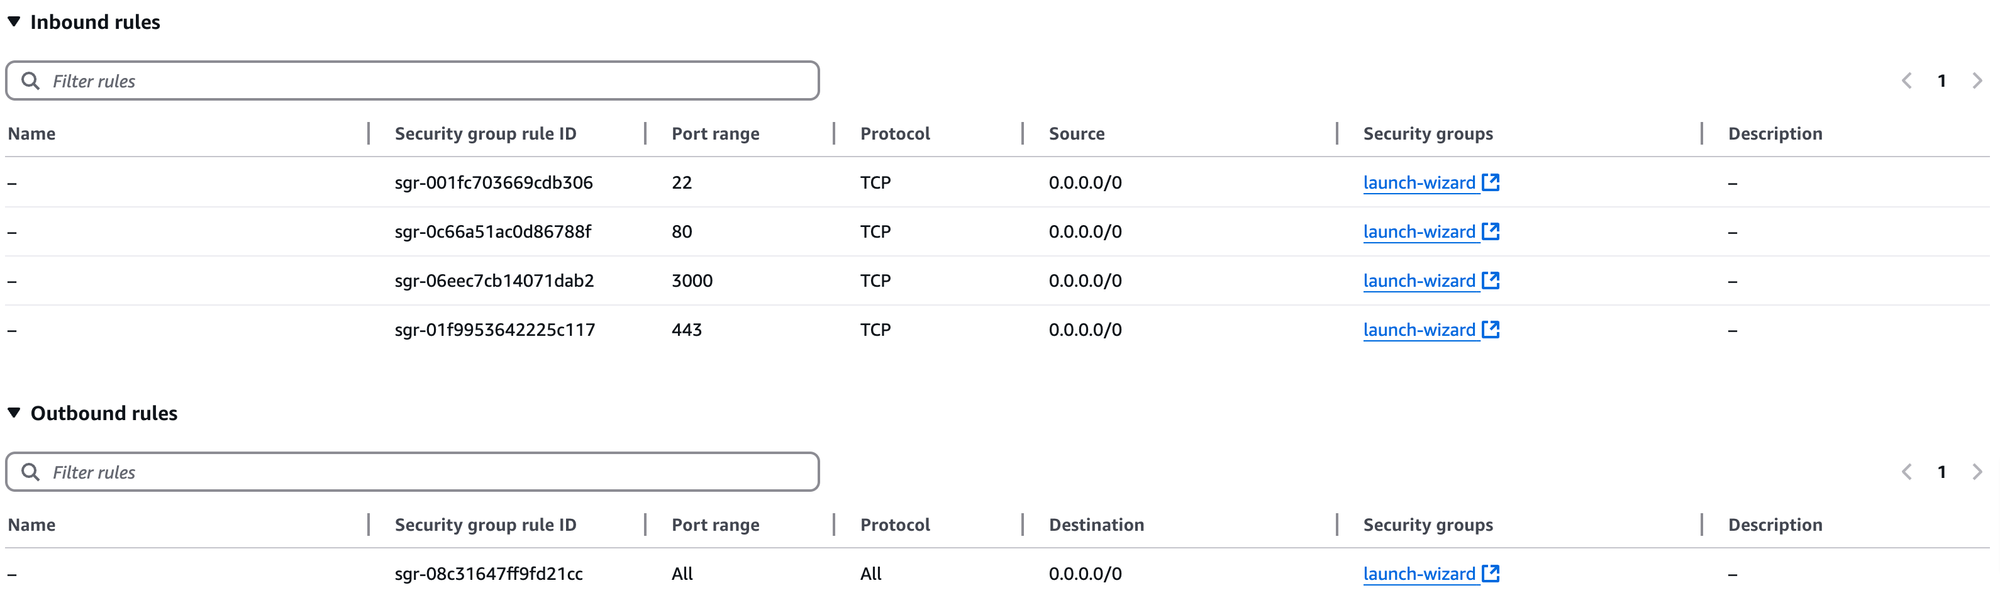
- Configure the Security Group
- to allow port 22 (for SSH)
- to allow port 3000 (Default port of Open Web UI - HTTP)
- to allow port 80 (Open Web UI - HTTP tied to 80 port if you like that port)
- to allow port 443 (for HTTPs)
- Select to create an SSH Key pair as well to access this server instance from your laptop or desktop
- Save the "pem" file from the key pair creation in a secure place. You need this "pem" file to access the EC2 instance
- Now, Access this instance via SSH command and SSH pem file from your laptop or desktop
Step-2: Install & Start Docker
Run the following command to install the Docker
Then, Start the docker and enable it
sudo systemctl enable docker
Step-3: Install & Start Ollama
Run the following command to install Ollama
Step-4: Download DeepSeek-R1 Model
Run the following command to download DeepSeek-R1 and check the status
ollama list
I downloaded deepseek-r1:latest 7.6B version but you can try other versions with various parameters capacities such as 1.5B, 14B, 32B, and 70B by provisioning the right computing capacity.
Step-5: Install & Start Open Web UI with DeepSeek-R1
-v /usr/share/ollama/.ollama/models/blobs:/app/backend/models \
ghcr.io/open-webui/open-webui:main
Step-6: Open DeepSeek Chat UI - Open Web UI
Open a browser from your laptop and enter
See port 3000 which needs the right AWS Security Group configuration as I explained above. Also, add extra security with HTTPS.
- At first, Open Web UI will ask you to enter your name, email, and password. Those are UI credentials. Just save those credentials for the next login and try the next questions.
- Then, you will see the DeepSeek chat interface to enter questions
- Note that Open Web UI works with other models as well so you will have to select the DeepSeek-r1 model
Step-7: My DeepSeek Questions & Answers
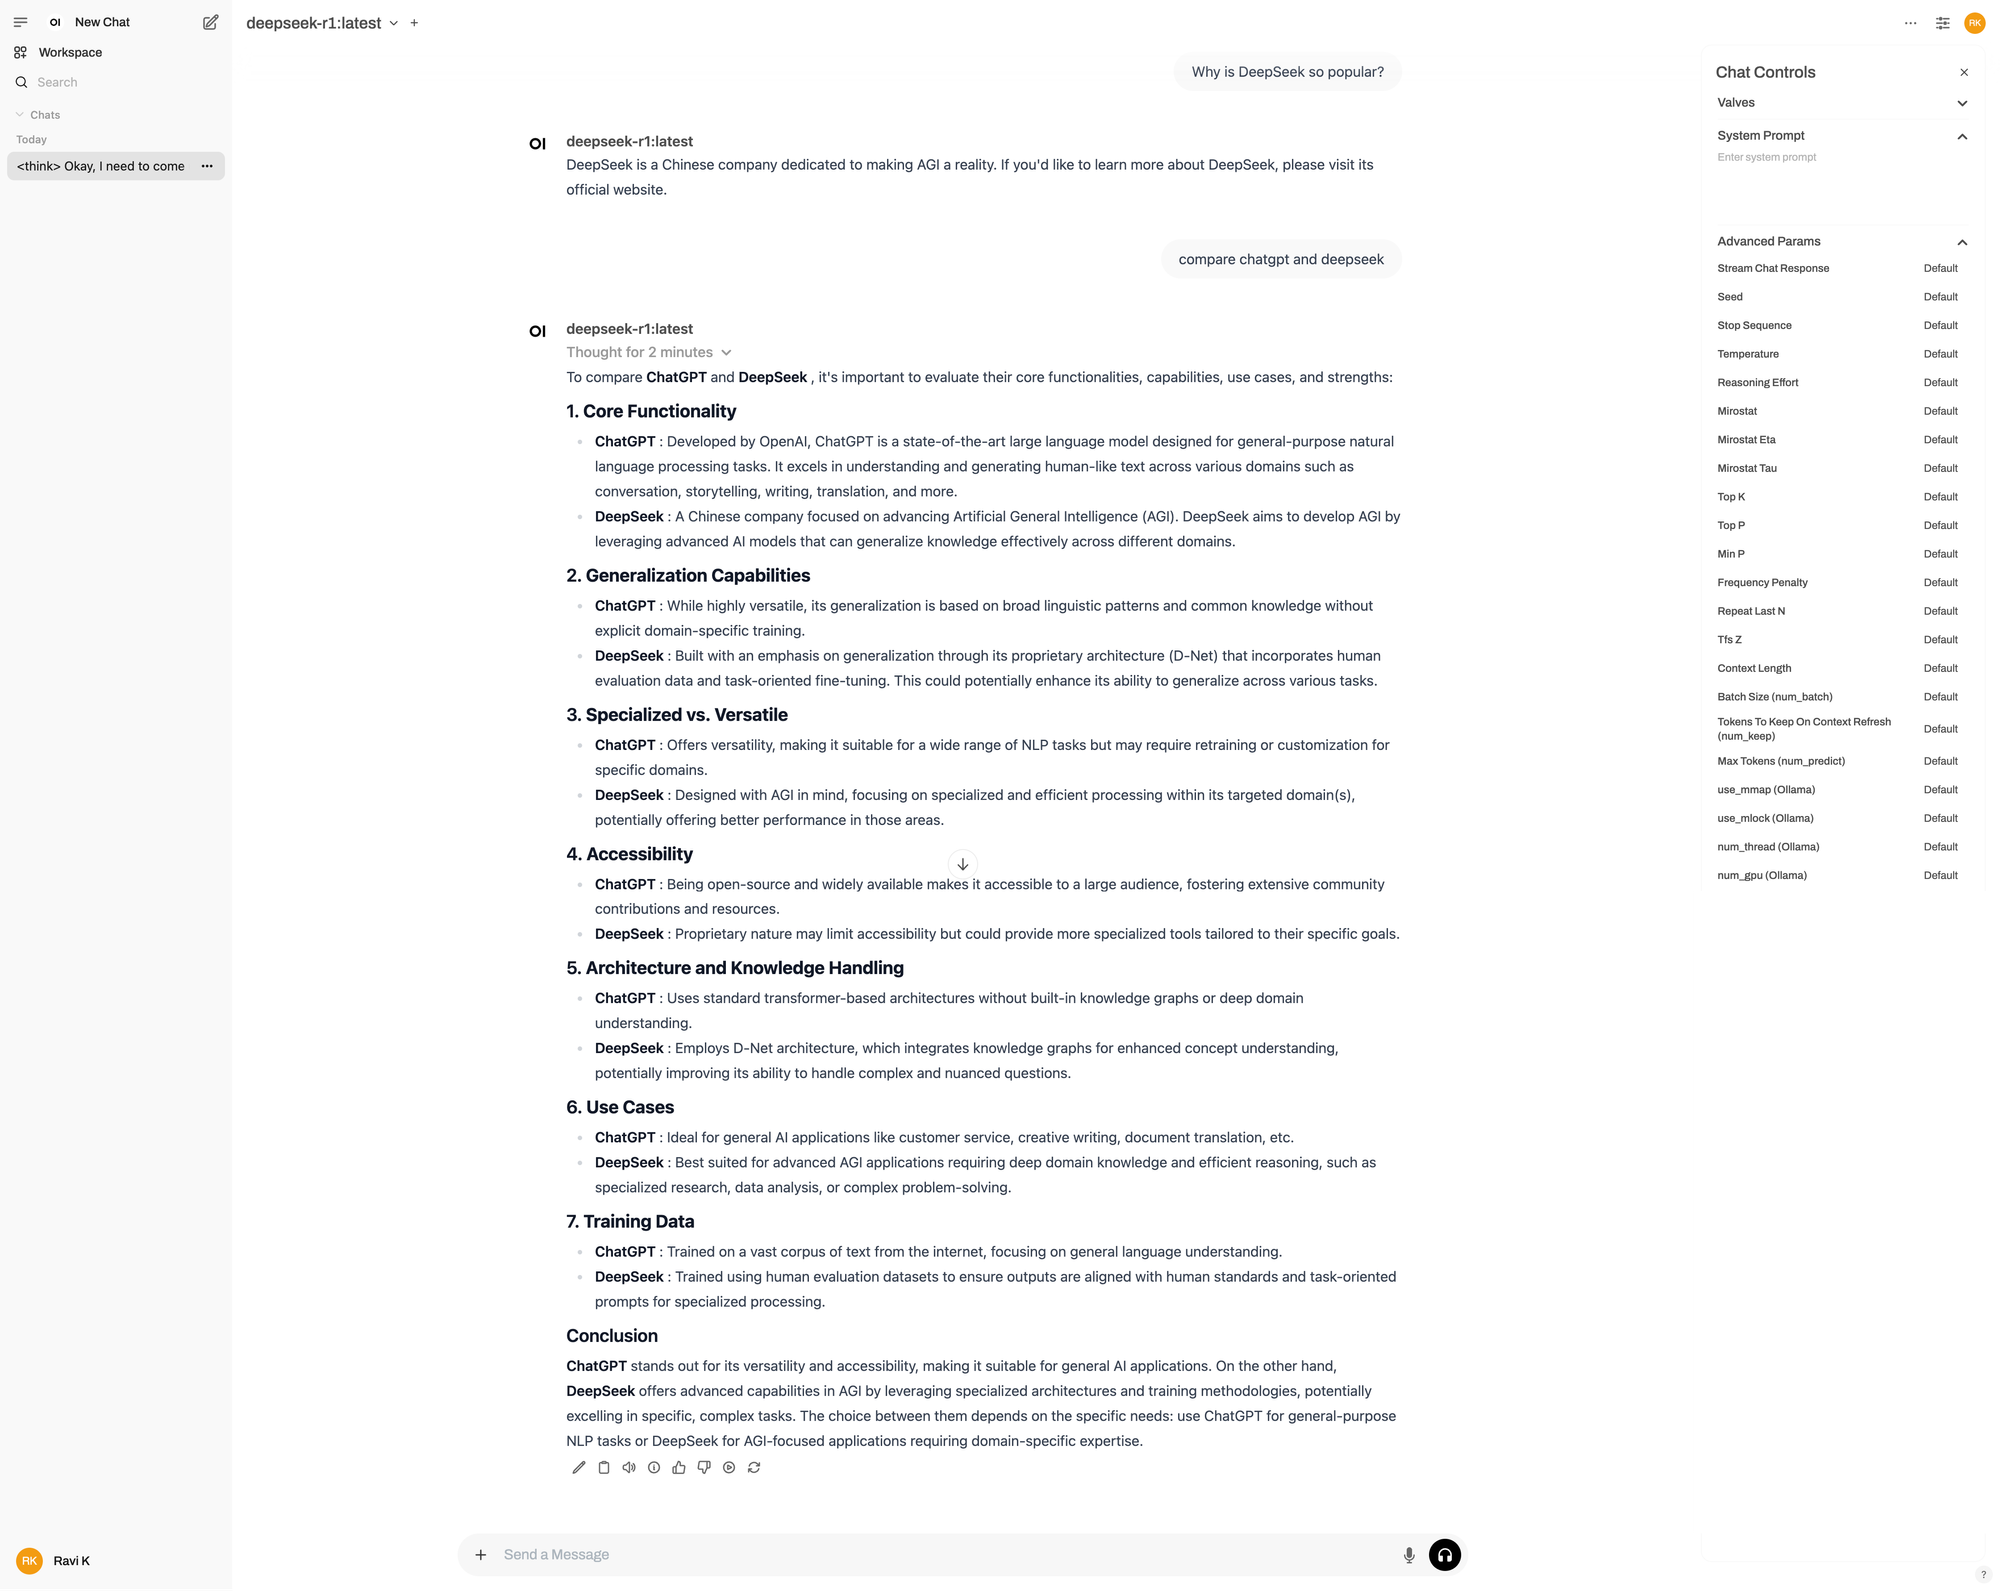
Once the Chat interface is open via "http://your-ec2-server-instance-public-ip-or-url:3000", I am able to try the following questions.
- Why is DeepSeek so popular?
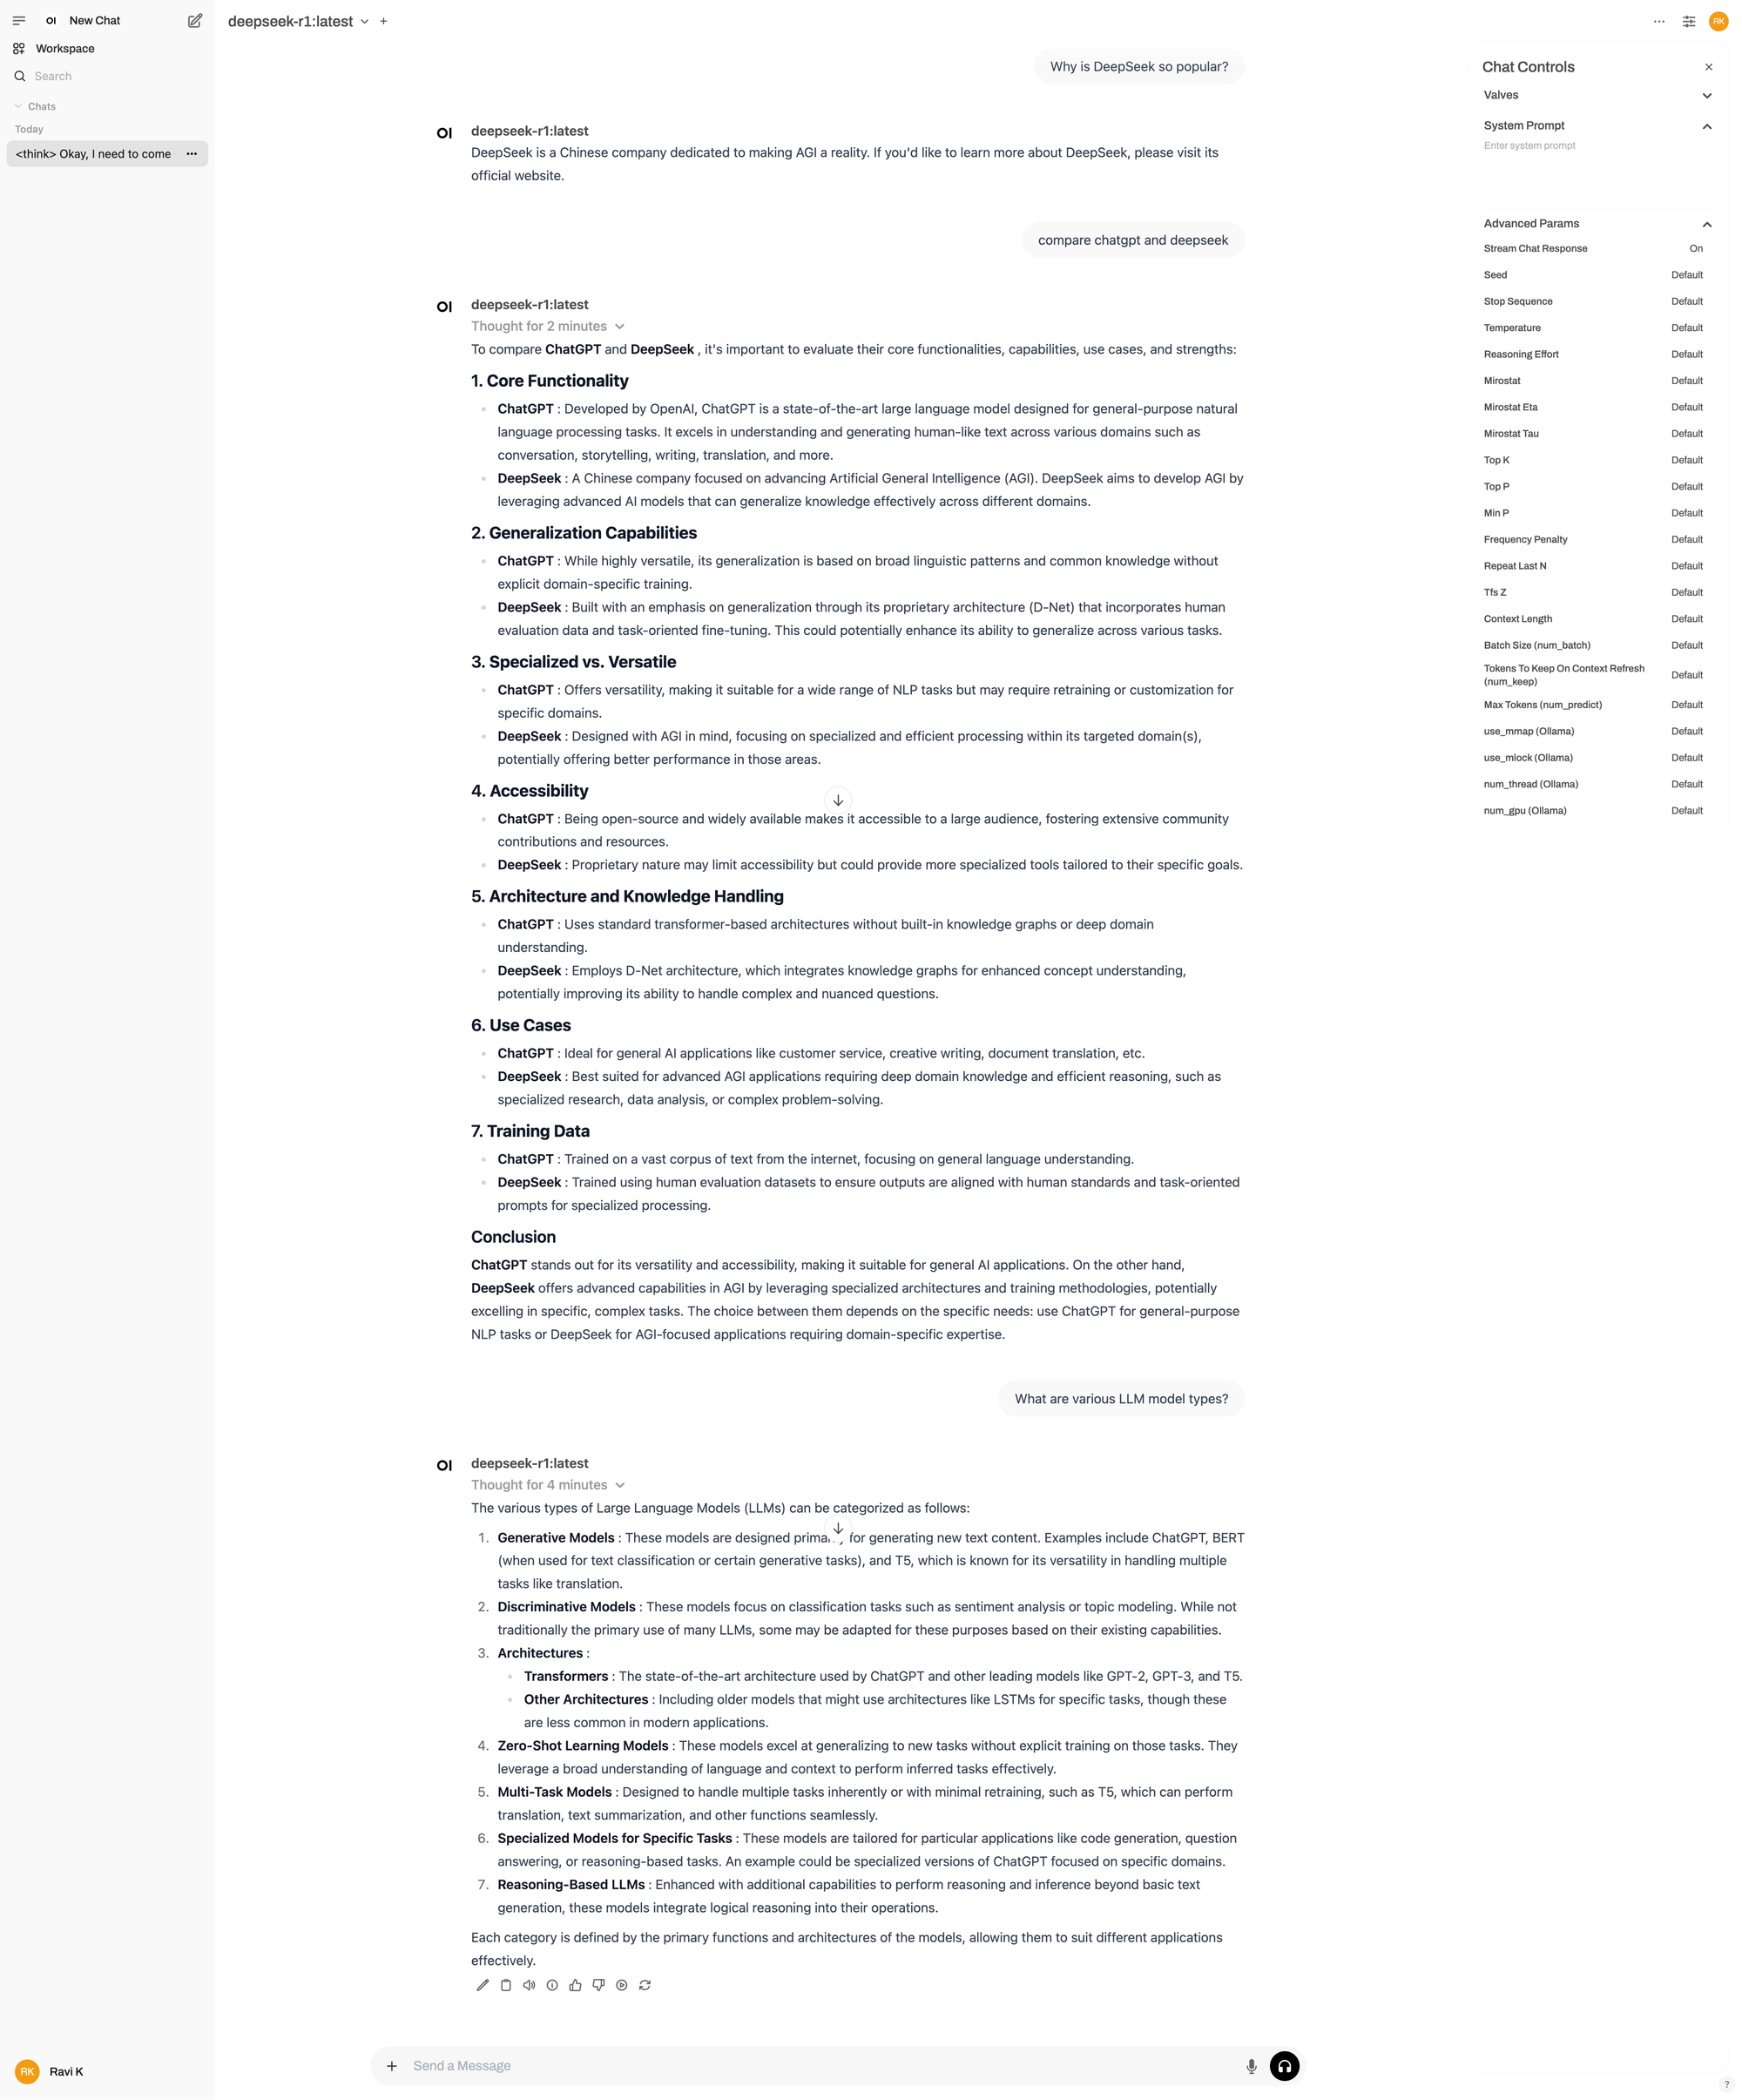
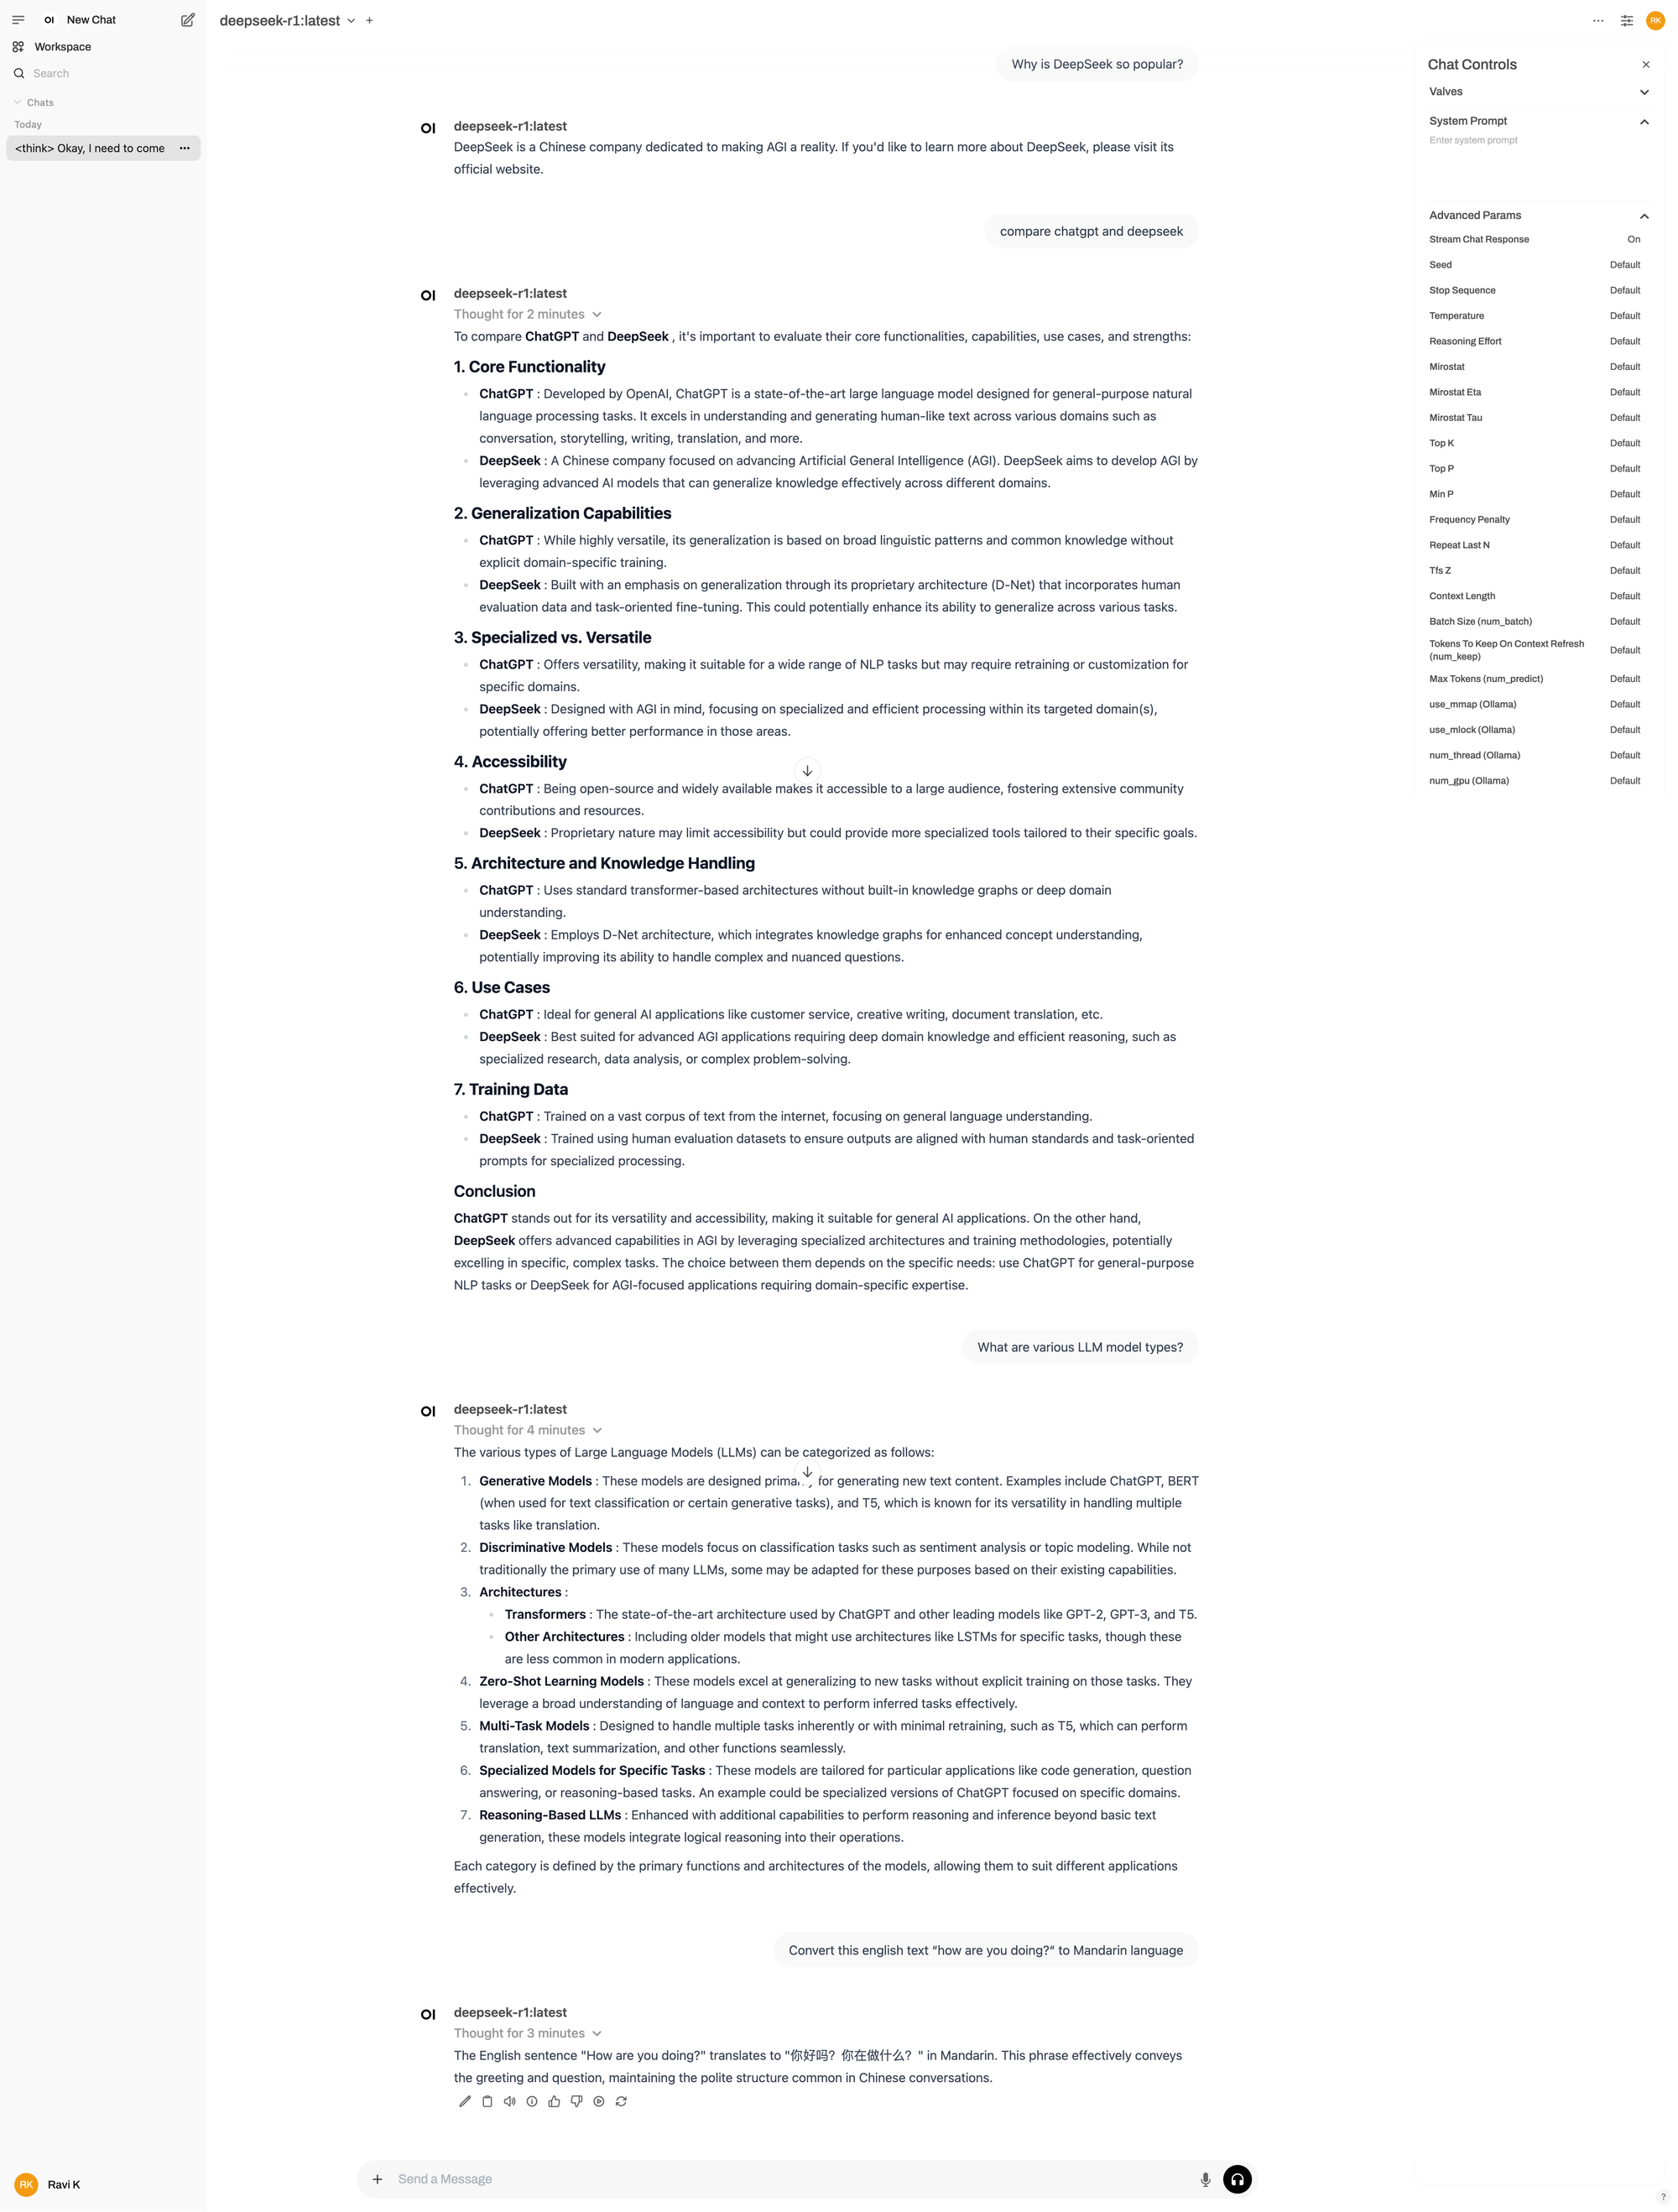
- compare chatgpt and deepseek
- What are various LLM model types?
- Convert this english text “how are you doing?“ to Mandarin language
See the DeepSeek Chat answers in the below screenshots
Step-8: Fixing Issues
- Since I used CPU instance type, DeepSeek is taking more time, almost a minute plus with a message "Thinking..." before providing an answer
- I got an issue where Open Web UI is unable to read the
DeepSeek-r1model. But, I am able to fix that issue with these commands.
and, add this line and save it since Ollama service by default listens on 127.0.0.1.
Once you save the file, stop and start Ollama.
Step-9: Good to know
- Check the available parameter options in the above DeepSeek Chat screenshots to understand available parameters, adjust them, and try the same questions.
- I took a Snapshot of the server for any further trials and terminated the EC2 instance to avoid unnecessary cost
- It took me around 5 hours to complete all this setup and try the DeepSeek questions in my environment
- It will cost me $20 to $100 based on the retention of EC2 instance dependencies Snapshot, VPC/subnets, IP, Security group, etc in the next 2 to 3 months.
- You can compare our own questions (see above questions) from our own AI DeepSeek Model with a better version of live DeepSeek https://chat.deepseek.com/ and https://chatgpt.com/
Step-10: DeepSeek Model's History
- 2023: DeepSeek LLM
- 2024: DeepSeek V2
- 2025: DeepSeek V3
- 2025: DeepSeek-R1-Zero
- 2025: DeepSeek R1
DeepSeek-R1-Zero with 671 billion parameters, a model trained via large-scale reinforcement learning (RL) without supervised fine-tuning (SFT) but has few challenges so DeepSeek introduced DeepSeek R1 Distill options to further enhance reasoning performance, which incorporates cold-start data before RL.
DeepSeek R1 with various parameters such as 1.5B, 14B, 32B, and 70B parameters, is designed for advanced reasoning tasks, leveraging reinforcement learning techniques to enhance its performance. Unlike R1, DeepSeek V3 focuses on natural language processing to handle a variety of applications.
DeepSeek also offers;
- DeepSeek Coder
- DeepSeek Math
Step-11: Comparison of DeepSeek R1 and DeepSeek V3
| Feature/Model | DeepSeek R1 | DeepSeek V3 |
|---|---|---|
| Open Source | Yes | Yes |
| Primary Purpose | Most common Chat functions | Logical reasoning and problem solving |
| Training Focus | All the data including Languages, Math, Coding etc | Reasoning based on Reinforcement learning |
| Architecture | Mixture-of-Experts (MoE) | Reinforcement Learning (RL) |
| Parameter Range | 671B | 1.5B to 70B |
Step-12: DeepSeek R1 Model Training
Here are the typical Training steps for the DeepSeek R1 Model.
- Fine-tune a DeepSeek-V3-Base with cold-start data points. Cold-start data sets are Domain specific labeled data sets based on Specific Tasks (English Grammar Tasks, Exams, Math tasks, Code tasks, etc)
- Apply pure Reinforcement Learning (RL) to enhance reasoning skills
- Generate synthetic data sampling via rejection sampling where the model creates its own labeled data based on past successful results.
- Merge both base data and synthetic data continuously
- Get the right reasoning answers based on the generic knowledge base and domain--level knowledge base
This is just a high-level outline of training in typical reasoning models.
Step-13: References
My DeepSeek Install Commands History